Have you ever seen those rustic, golden luffa sponges in someone’s kitchen or bathroom and secretly wished you could make them yourself? You want to replace plastic sponges with a 100% natural, homegrown product but feel lost on where to even begin, from choosing the right seeds to knowing the perfect time to harvest.
This article is the detailed roadmap you’ve been searching for. We will guide you through the entire process of growing luffa for sponges, from soil preparation to seed selection and planting. By the end, you’ll not only master the technique but also confidently turn a small corner of your garden into a “factory” for quality luffa sponges, perfect for your family or as a unique, handmade gift for friends.
When I was a child, I vividly remember my grandmother’s luffa vine. It wasn’t just a source of shade for her small yard; it was a world of wonders. She didn’t just pick the young, tender luffa for soup; she also left some gourds to age, shriveling and drying on the vine. We kids would always wonder, why leave the fruit to spoil like that?
Then one day, she took down those dry gourds, soaked them in water, and gently peeled away the outer skin. A fibrous, golden-ivory mesh, tough and resilient, emerged to my utter amazement. That was the first time I ever saw a luffa sponge. The scent of the sun, the soil, and the plants was woven into that fibrous sponge—a fragrance no industrial bath puff could ever replicate.
The journey of transforming a tiny luffa seed into a useful sponge isn’t as complicated as you might think. It’s a beautiful symphony of soil, water, sun, and the grower’s patience. Join me, someone who has been connected to the garden and these luffa vines for many years, as we explore every note in this wonderful symphony.
Step 1: Preparing the Soil – The Golden Foundation for a Fruitful Luffa Vine
Just like building a house requires a solid foundation, the process of growing luffa for sponges demands meticulous soil preparation. Luffa plants are heavy feeders; they need a wealth of nutrients to grow long vines, flower, and produce large, firm gourds that yield a quality sponge.
The “Golden” Spot for Your Luffa Vine
Choose a location bathed in sunlight. Luffa needs at least 6-8 hours of direct sun each day to photosynthesize and thrive. A corner of your yard, an empty patch of land by a fence, or even a sunny balcony are all ideal choices.
“Cooking Up” a Feast for Your Soil
Don’t just dig a hole and drop a seed in. Take the time to enrich your soil. The ideal soil for luffa needs to be loose, rich in organic matter, and well-draining.
I usually start my soil preparation about 2-3 weeks before planting. First, till the soil to a depth of about 30-40 cm until it’s thoroughly loosened. The feeling of sinking a spade into soft, moist soil, as fluffy as the inside of a bread loaf, is truly exhilarating.
Next, mix in a generous amount of organic matter. Well-rotted compost or aged manure (cow or chicken) is the best choice. You can also add biochar, coconut coir, and a little garden lime to disinfect the soil and balance its pH. A recipe I often use is 2 parts topsoil, 1 part composted manure, and 1 part biochar/coconut coir. Mix it all together, and you’ll have a perfect, nutrient-rich blend ready to welcome the new seedlings.

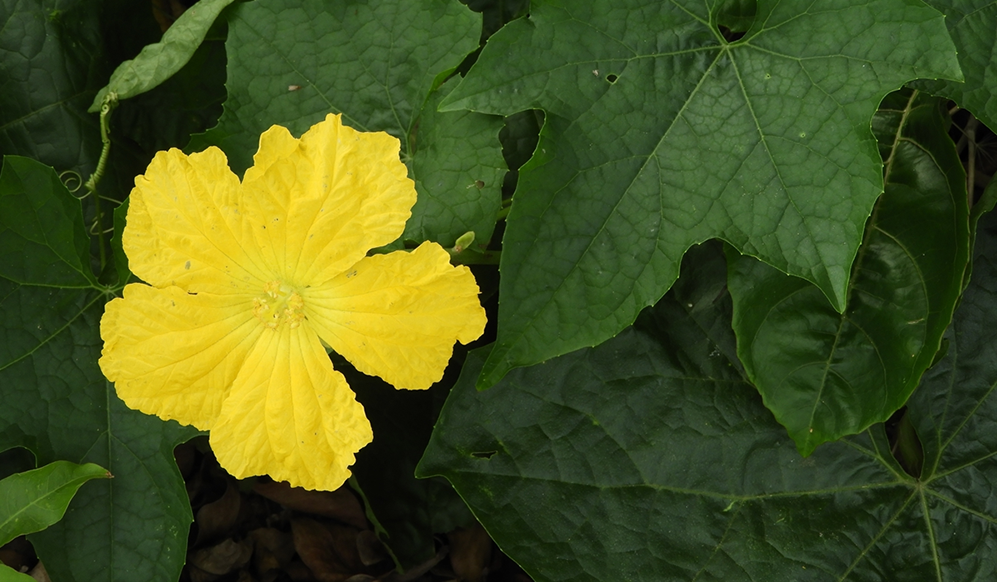
Step 2: Selecting the Luffa Variety – The Soul of a Quality Sponge
This is an extremely crucial step that determines 90% of your success. Many people fail right from this stage because they confuse the edible, smooth luffa with the luffa variety grown for sponges.
Smooth luffa (small fruit, smooth green skin, soft) produces very little fiber, and the fibers it does have are flimsy and unusable. The variety you need to find is the Ridged Luffa or Angled Luffa. This variety is characterized by large, long gourds with hard skin and prominent ridges. It is this tough skin and special fruit structure that create the durable, strong, and resilient fibrous skeleton.
The Secret to Choosing “Perfect” Seeds
When selecting your seeds, look for ones that are plump, black, and feel firm in your hand. Avoid seeds that are flat, pale, or show any signs of mold.
To ensure quality, you should purchase seeds from reputable sources. For example, at Loofah Global, we specialize in selecting and providing luffa varieties for sponges that produce long, straight gourds, proven over many seasons to yield superior sponge quality and productivity. Starting with good seeds is like getting a head start in a race.
Before sowing, you can soak the seeds in warm water (2 parts boiling, 3 parts cold) for about 4-6 hours, then wrap them in a damp cloth to germinate. After just 1-2 days, you’ll see tiny, beautiful white roots emerging, signaling the start of a new life.
Step 3: Sowing and Care – The Journey from Seedling to Lush Green Vine
Once the soil is ready and the seeds have sprouted, it’s time to begin the luffa cultivation process.
Sowing the Seeds and Building a “Home” for the Luffa
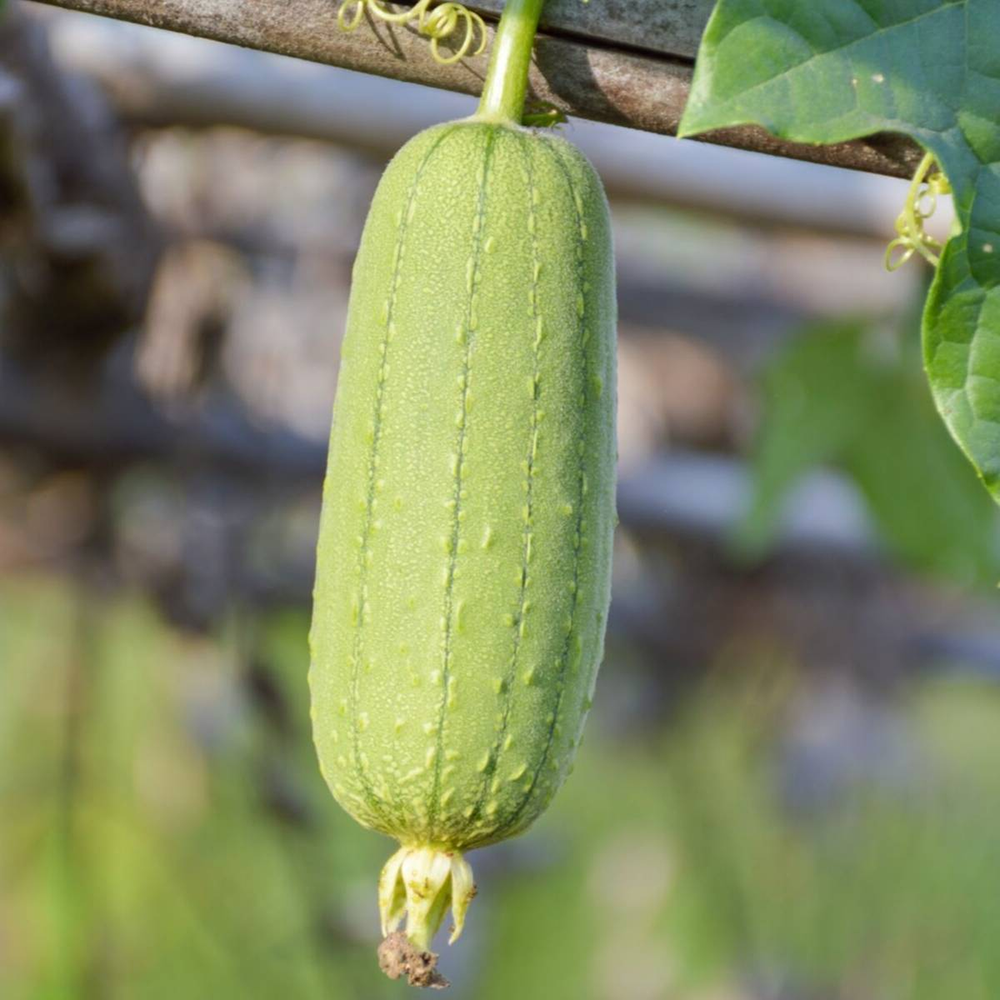
You can sow the germinated seeds directly into the prepared soil pits, 2-3 seeds per pit, then cover with a thin layer of soil about 1-2 cm deep. Alternatively, you can start the seedlings in pots before transplanting them.
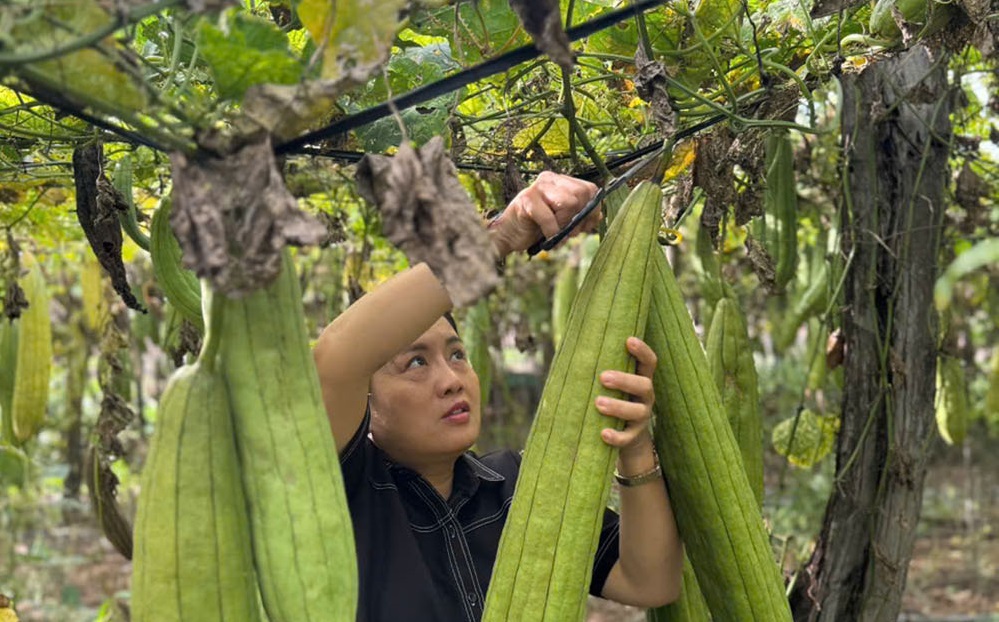
When the seedlings have 2-3 true leaves and begin to send out their first tendrils, it’s a sign they need a “home” to climb. The trellis for your luffa must be very sturdy! Don’t underestimate the weight of mature luffa gourds. A vine laden with fruit can weigh tens, or even hundreds, of pounds.
You can build a flat-top trellis, an A-frame trellis, or utilize an existing fence or wall. Use strong materials like bamboo, wood, or a metal frame. Watching the tender luffa vines wrap themselves around and climb the trellis each day, you’ll feel the powerful life force of nature.
The Daily “Meal”: Watering and Fertilizing
Luffa loves moisture but cannot tolerate waterlogging. Water deeply in the early morning or late afternoon, ensuring the soil is moist but not soggy.
In terms of nutrition, you can start applying supplemental fertilizer about 2 weeks after planting.
- Vine Growth Stage: Apply a fertilizer with a higher nitrogen (N) content to promote lush, green foliage.
- Flowering and Fruiting Stage: Switch to a fertilizer with higher Phosphorus (P) and Potassium (K) content to stimulate flowering, increase fruit set, and help the gourds grow strong and firm.
You can use a balanced NPK fertilizer or, even better, organic options like worm casting tea or homemade banana peel fertilizer.
Step 4: Harvesting and Processing – The Most Magical Moment
This is the reward for all your hard work. Unlike harvesting luffa for eating when the fruit is young, harvesting luffa for sponges requires patience.
When is the Golden Time to Harvest?
Let the luffa gourds age and dry naturally right on the vine. The signs to look for are:
- The skin turns from green to yellow, then to a dark brown.
- The gourd becomes very lightweight.
- When you shake it gently, you can hear the seeds rattling inside.
That’s the universe signaling to you: “The luffa sponge is ready!”
The Luffa’s Metamorphosis
The process of extracting the luffa sponge is a truly emotional experience.
- Soak in Water: Harvest the dry gourds and soak them in a large tub of water for about 20-30 minutes. The water will soften the hard, dry outer skin.
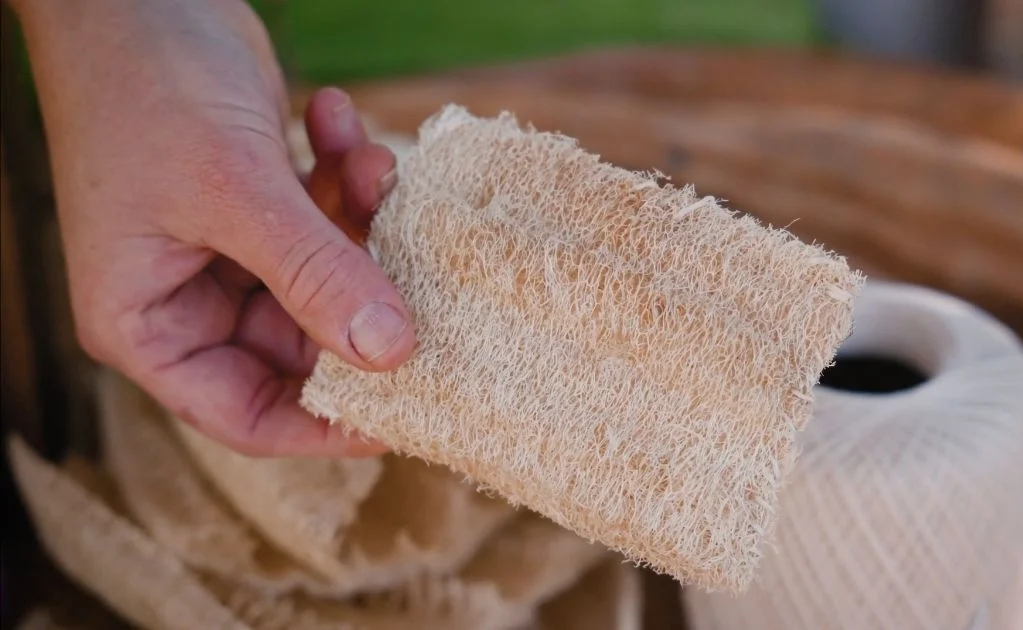
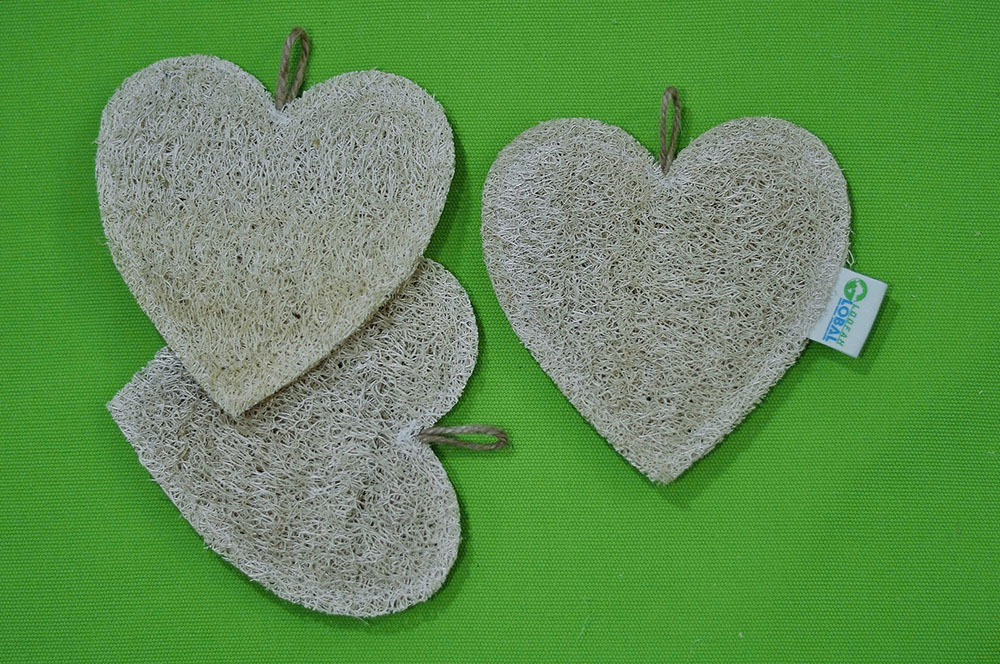
- Peel the Skin: Gently squeeze the gourd, and you’ll feel the skin crack. Carefully peel this layer off. The moment the intact, golden-ivory sponge emerges from the rough, ugly skin is incredibly satisfying.
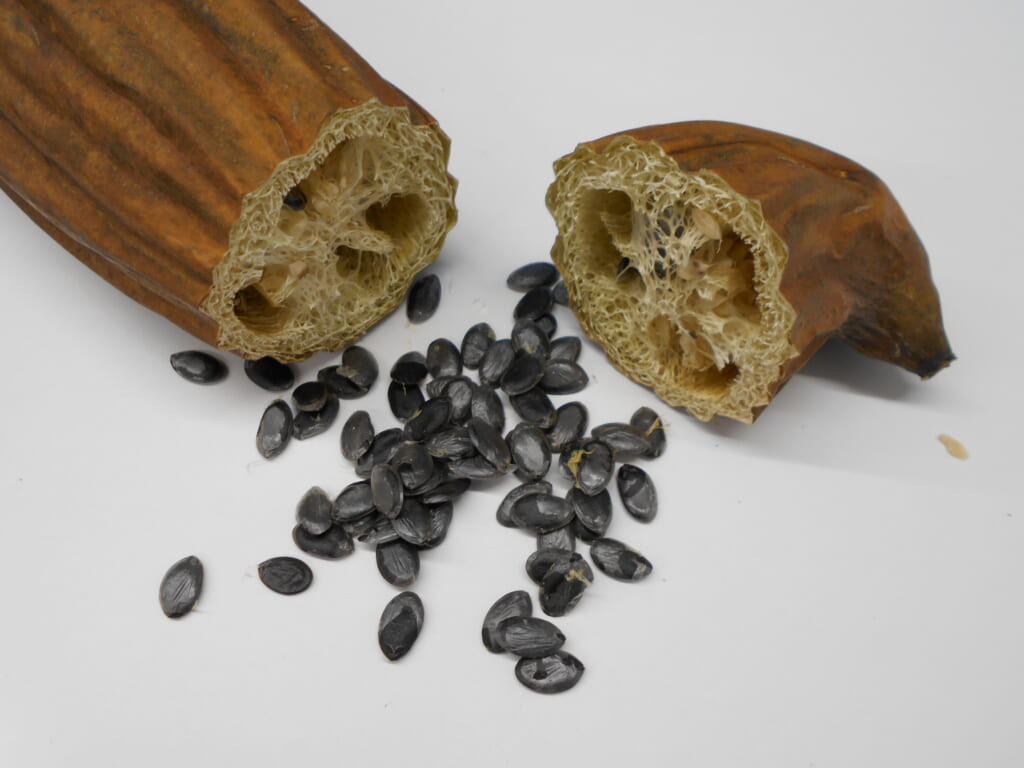
- Remove the Seeds: Cut off the top end of the luffa and turn it upside down, shaking vigorously. All the glossy black seeds will fall out. Be sure to save the plumpest seeds for the next season’s planting—a beautiful cycle of life!
- Wash and Dry: Use a strong jet of water to wash away any remaining pulp and slime. Then, hang the luffa sponge to dry in the bright sun. The sun and wind will help bleach the sponge, dry it out, and give it a wonderful natural scent.
Holding the luffa sponge you grew yourself, feeling the slightly rough, firm texture of each fiber, and inhaling the scent of the sun, you will feel a surge of pride and happiness.
Conclusion
From a tiny seed, through the dedicated process of growing luffa for sponges, you have created a sustainable, environmentally friendly product. It’s not just a luffa sponge; it’s a story of patience, of the connection between humans and mother earth, and the joy of enjoying the fruits of your own labor.
Your garden can be more than just a place to grow food; it can become a green workshop. Start today, and you’ll be amazed at what you can achieve. If you need a quality source of seeds to begin, don’t hesitate to contact Loofah Global; we are always ready to accompany you on this green journey.
Frequently Asked Questions
Is growing luffa for sponges different from growing it for food?
Yes, the biggest differences are in the variety selection and the harvest time. To get sponges, you must grow the Ridged Luffa variety (large gourds, hard skin) and let the fruit age and dry completely on the vine. In contrast, edible luffa (Smooth Luffa) is harvested when the fruit is still young and green.
How long does it take to harvest a luffa sponge?
The entire process, from sowing the seed to harvesting a dry gourd for its sponge, takes about 4-6 months, depending on weather conditions and care. This wait is completely worth it when you hold the final product in your hands.
Where can I buy quality seeds for growing luffa sponges?
You should look for reputable nurseries or seed companies to ensure a high germination rate and the best possible sponge quality. Loofah Global is a trusted source that provides high-quality plant seeds, including carefully selected luffa varieties for sponges. You can contact us via our hotline or website for detailed advice.